Posts in Category: Garel/LeRun/Max/AXL
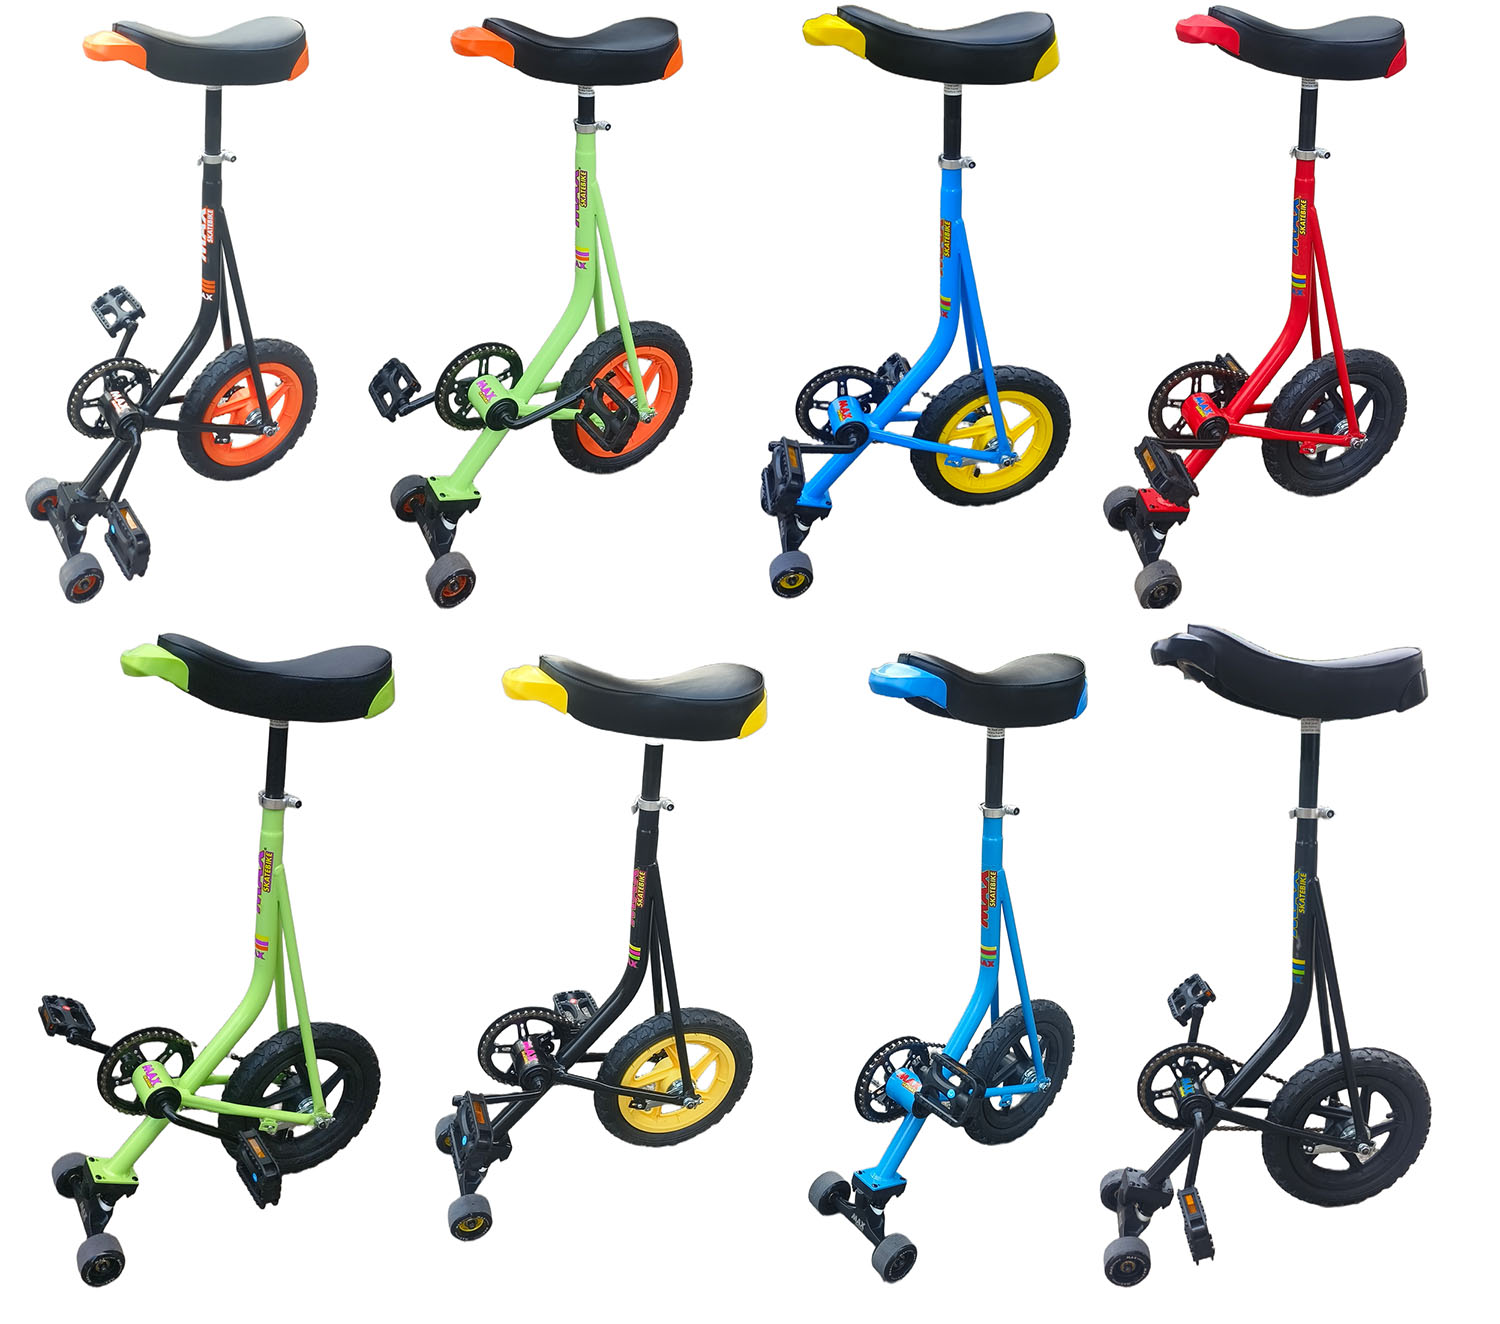
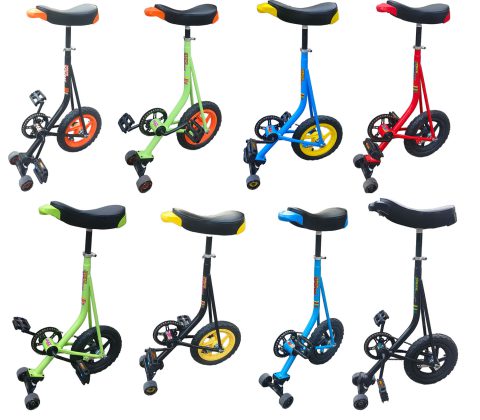
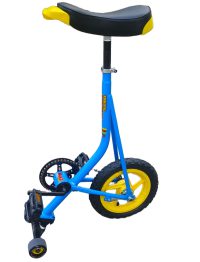
NEW 2026 MAX Skatebike & MAX Skatebike Pro
Exciting News
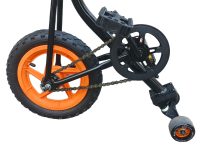
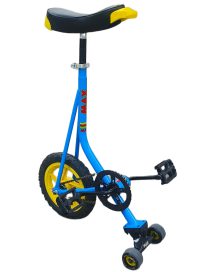
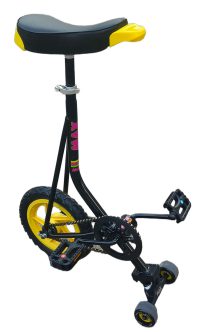
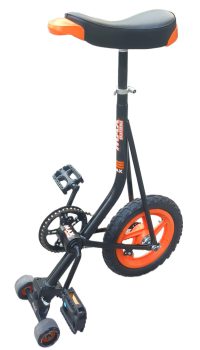
The NEW 2026 MAX Skatebike still features a steel frame, a height-adjustable saddle and a 12.5-inch rear wheel with a pneumatic tyre.
Compared with the original version, the new MAX Skatebike includes several improvements. The saddle now features a replaceable plastic handle at the front, allowing you to easily swap it for one in a different colour. The rear section of the saddle can also be replaced. The overall dimensions remain almost identical to those of the original MAX Skatebike. The biggest improvements are the front truck itself and the way it is mounted to the frame.
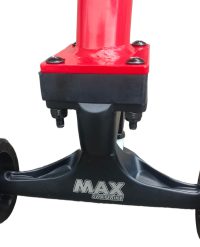
The MAX High Flex Truck is an extra-high, 9-inch-wide truck. It offers highly responsive steering and allows for extremely tight turns. The tall conical bushings can be adjusted to suit riders of different weights.
The front wheels feature ABEC 7 bearings and measure 70 mm, with a hardness of 83A. Made from high-rebound polyurethane, they are combined with a 15 mm riser to provide optimal positioning. The risers use a universal fitting. If you want to install 80 mm wheels, simply use a 10 mm riser.
The truck mounting system is universal, allowing you to install virtually any skateboard or longboard truck. This makes it easy to customise the Skatebike’s handling and riding characteristics.
The 2026 MAX Skatebike is available in eight different colour combinations. Both its colour scheme and components can easily be changed, allowing you to create your own custom Skatebike.
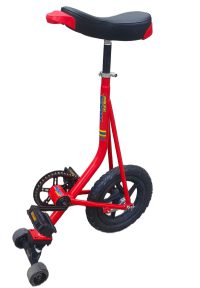
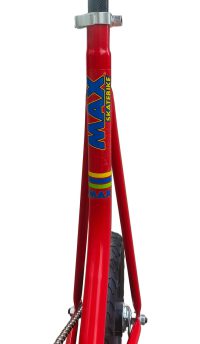


LeRun Restoration


Nice restoration. Love the colours. Here are the emails between Theresa, John N and myself.
Hi, My name is Theresa Ness, of Chester Iowa. I picked up this LeRun at a flea market a few weeks ago. I didn’t know what it was, and was told it was a training unicycle. My curiosity and price convinced me to buy it. Through your website, have learned not only what these are, but that they can be restored.
I focused on the front part right away as I don’t know anything about skateboards. A skateboard shop got me on the right track. The bushings were completely worn out (see pics), and the tires were original (says LeRun on them) but were dry hardened. I was able to get all these parts replaced.
Today I took apart the tire, as the rubber was very dry rotted. There was a lot of dirt in the axle, so I took it apart, taking pics of the progress to make it easier to put back together. However, when I took apart the bearings on the inside, it all popped apart, I can’t tell which goes where, and if these pieces that I don’t recognize, can be replaced (see pic).
I do plan to strip the frame down and repaint it, as there are rust spots. I am unsure if it’s worth trying to get a replica brand sticker.
I know VERY basic bike mechanics (I am a touring cyclist), and thought this would be a fun little restoration. But I would greatly appreciate any information and advice on getting this LeRun rolling.
-Theresa N
Theresa
Nice ride. Jon is our LeRun heavy having restored several. The front truck looks great. How much you tighten the screw effects vertical stability. Also depending on your weight a firm spacer helps. I usually run 90+
On the site if you look at the LeRun posts there are many pages of info.
https://skatebike.org/category/garel-lerun-max/lerun/
On Nick’s page is a LeRun template for the logo
The wheel inside is standard coaster brake setup
https://sheldonbrown.com/coaster-brakes.html Sheldon is the wiki of bike repair
https://www.parktool.com/en-us/blog/repair-help/coaster-hub-overhaul-pedal-brake-hub
Rich Helms
Hi Theresa, that’s a really cool Lerun! I checked out the photos and looks like it’s in good condition. It looks like you’ve got an extra bushing put in the truck set up, there’s no need for the black bushing and metal spacer in there, but if it works for you then stick with it! I use 96a bushings on mine and have the hanger (the axle with skateboard wheels) quite loose but would recommend starting with it quite tight and loosen it when you get more confident on it.
It looks like you’ve got the coaster brake workings in the right order in the photo, the bearings will rest in the wheel hub, screw the driver into the clutch, the brake pads need to be pushed on a little. Basically when you back pedal the clutch will move backwards and push the bake pads against the wheel hub wall to stop the wheel turning. Alternatively you can get a 12 inch wheel off another bike and put that on it, the standard coaster brake Lerun used is pretty twitchy of either nothing or skidding. I have deactivated or change wheel on most of mine and run it without brakes and use my foot instead.
When riding I’d say the main thing to remember is the faster you go the easier it is to balance, like if you were riding a bike with no hands.
I hope the restoration goes well, give me a shout with how you get on with the wheel
Hello again!
I figured I’d send you pics of the completely customization/restoration of my LeRun. It’s already got a few miles on it.
New parts:
- KMC bike chain
- OJ Hot Juice wheels 78a 60mm
- Kris Holm KH double post seat clamp
- Twisted Tangerine PC pedals
- WD 12.5x 2.25″ Black/Neon Green tire.
- Glow in the dark duck valve stem cap
- Painted by myself with Rustoleum neon spray paint and clear coated.
People asked about the seat restoration. See last 5 images in the gallery.
It had a thin plastic barrier between the seat and metal mount, which I had taken off because it was crummy. I put a piece of window barrier plastic, cut to size, in its place. I figure it is an anti rust/corrosion barrier and the window plastic is thicker and hardier. I painted the exposed metal underneat with rust protectant black spray paint. Outside of the plastic barrier and nuts (as I prefer lock nuts), all parts are original to the seat.
The other pictures are for the specific question on Facebook. I put an Australian dollar coin that can be used for scale of part sizes (since it was an Australian who asked).


Beautiful LeRun Restoration – Yujin – Singapore
Yujin from Singapore contacted us on Jan 29, 2023 with questions on restoring his LeRun. Yujin was looking for the LeRun sticker. I forwarded Nick’s template he used on his restoration.
Today:
Gosh has it been 1.5 years. Anyway, i’m happy to declare that my Lerun restoration is complete. I did my best to restore it on my own, but after a whole year of struggling, I had to get some help. The condition of the skate bike was quite poor and it was a challenge to disassemble. I sent everything to a bike restorer, who chromed the metal parts, re-upholstered the seat, and de-rusted and re-painted the skatebike for me. I gave him the stencil you shared with me earlier, and he used it.
Once I got it all back, I bought the bushings from amazon, pivot cups from Lazada, a new chain, and here is the final product. With before and after pictures.
Rgds,
Yujin
What a beautiful restoration. Well done Yujin.


Max Skate Bike Commercial (The Best)


MAX Skatebike Sticker
Dieter F from Germany wrote about a Max skatebike he had.
I own a Max skatebike since the 80ties. It was the demonstration model of the windsurf shop I helped out during my study times. I took it everywhere with me and used it in Germany, Korea, India and China. It finally showed a lot of dents and rust and so, when I had the chance in 2020 in China for powder coating I made a refit. We even made a tool to press new rubber for the skateboard steering. The former plastic upper skateboard truck I already replaced in the 90ties with a CNC made alloy part.
Here is the label Dieter drew to have a new seat post sticker made.

His work file
230518_Max_Skatebike_Sticker_draft_V2.4

Chrome LeRun Restoration – Jon N – UK


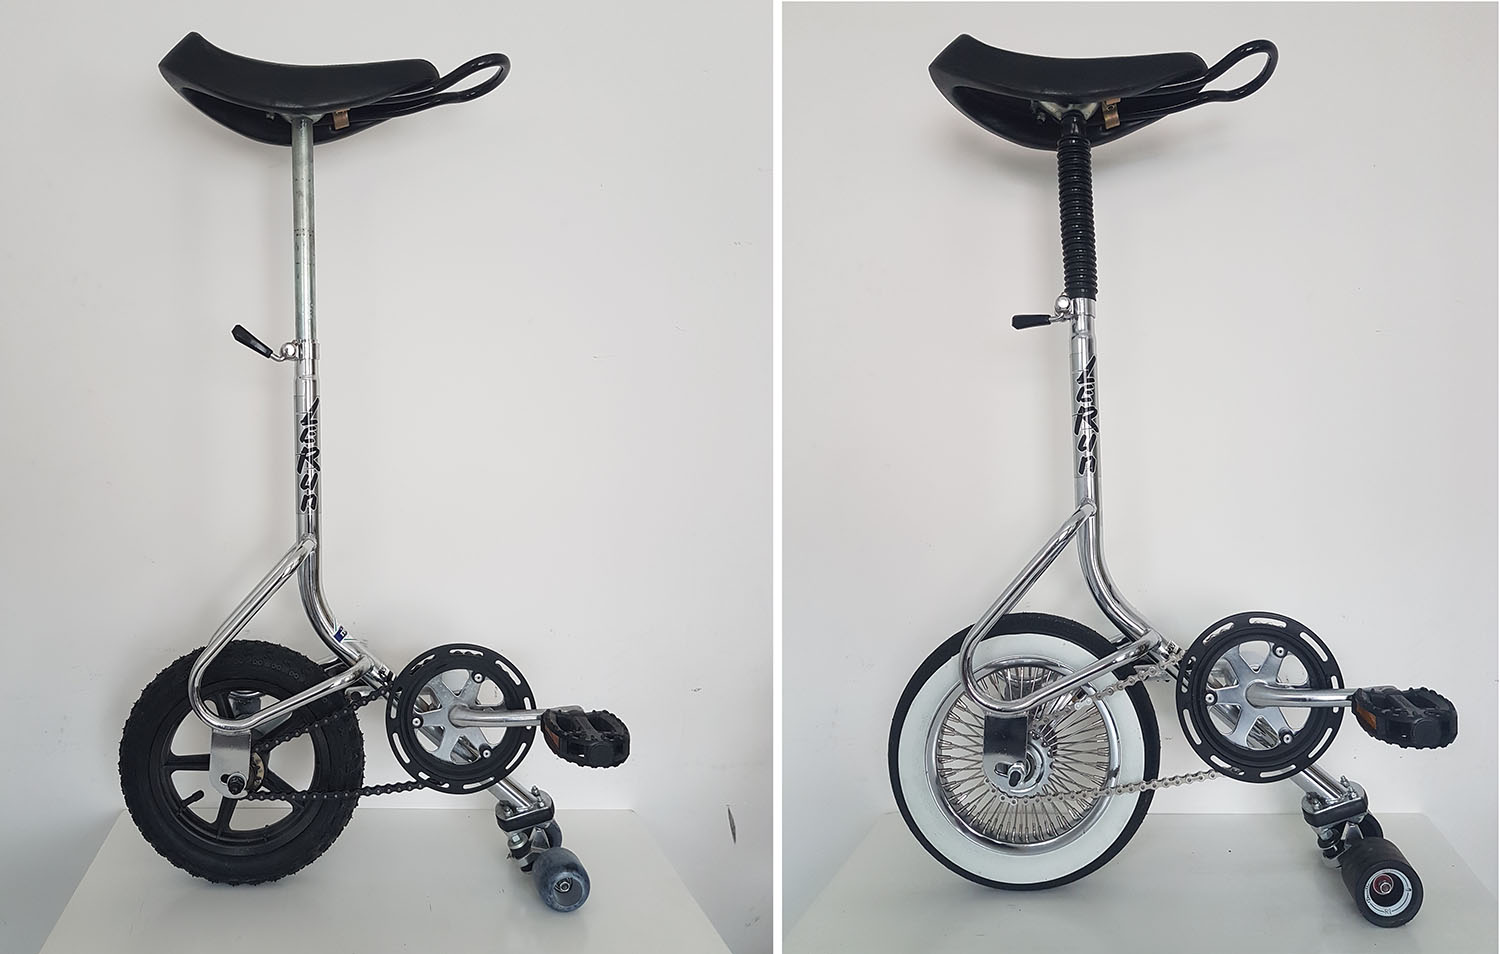
I had seen this chrome Lerun for sale and had a vision of how it could look with a few changes. Whilst I’m not able to verify a production date it has a few differences from the other Lerun models and I believe this is from towards the end of the Lerun skatebikes, if you have a record of when you bought your Lerun from a shop please get in touch!
The crank has 36 teeth like the previous Lerun models however the rear wheel has a 12 tooth gear on it rather than 14, the serial number is different in that now it is a sticker with the number on rather than being stamped into the metal on one of the wheel-stays. There was no seatpost housing when I purchased it but I did try it with the housing from a different one, do you think it looks better with or without it?
As it has a mirror-like chrome finish my vision was to swap out the rear black 5 spoke rear wheel and put in a chrome wheel with as many spokes as I could find and put some distinctive skateboard wheels on to top it all off. I managed to source a 52 spoke 12” coaster brake wheel through ebay and was shipped from the USA with a 16 tooth gear pre-installed and I also purchased a Duro whitewall tyre that was wider than the previous Kenda whitewalls I have used on other models and also has a wider whitewall section than Kenda tyres.
I tried some 70mm skateboard wheels initially but they were slightly too big and were changing the angle of the seatpost to be leaning back slightly so I switched to some 60mm shark wheels which maintain the 90 degree seatpost angle. Shark wheels are fantastic and definitely get more looks and interest from people with their unique design that looks like it would be a rough ride but have a perfectly round end-view profile.
Riding with the 16 tooth gear means it’s more of a cruiser rather than speed demon however this could be made faster by switching to a gear with fewer teeth. This isn’t one I’ll be using down at a skate-park anytime soon but definitely widens the spectrum on how skatebikes can look!
Jon N (UK) at Instagram: @SkateBikeUK
See Jon’s Chrome Minson Restoration


Restoring an Original AXL – Linda M – Florida
Linda M. (Florida, USA) and her husband bought this AXL for their 12 year old son in the mid 1990’s. They decided to restore it as a Christmas present for their 11 year old grandson.
The frame was stripped and powder coated. The seat was commercially redone.
Before


After


Nick’s LeRun Jr Skatebike Restoration
Nick W (UK) contacted me August with questions on rebuilding a LeRun Jr. I connected him with Jon N (UK) who has written most of the LeRun articles here. Turns on they live close to each other. As you can see from the before images, the scoot was in pretty rough shape. I love the colour. Here is Nick’s story in his words.
Before


After


So the story begins when I was 8 years old, living in Holland. My parents bought me this new contraption called a skatebike, supposedly Michael Jackson had one! I remember tearing around on it as an actual mode of transport, bike lanes being superb in Holland and me living in a sleepy suburb meant it was actually viable. Always loved speeding along and then pulling a massive skid with the back pedal braking.
Fast forward 34 years and the skatebike has made various appearances over the years in gatherings, parties etc and always provides a ‘woah, what is that?’ kind of reaction, followed by a rush of the more adventurous people wanting to give it a go. Sometimes it sits dormant for years at a time, but always comes back out to play when the time is right!
So we’ve been getting a pool build done. The guys laying the surrounding patio are onsite in the beautiful sunshine and baking hot temperatures, and somehow a unicycle comes up in conversation. I say nothing, but the next day I’ve got the unicycle out ready, freshly pumped-up wheel… and also the skatebike. Cue all 3 of the patio guys leaping at the chance to give them both a go. And as always, everyone fails miserably on the unicycle, but get to grips with the skatebike nice and quickly. The video I’ve shared is of the ‘pool chase’, one riding the skatebike and the other on my latest of crazy contraptions, my onewheel. Lots of fun had!
But the skatebike is looking tired, paint flaking off everywhere, severe rust showing all over, dirty and sad. I’ve thought to myself many times over the past decade that I really should clean it up, and now, finally, I’ve found the motivation and impetus to do so.
Into the workshop I go, and begin the teardown, carefully photographing everything along the way as I’ve never done any work to any kind of bike, beyond pumping up tyres! Most things came apart fairly easily, but I definitely got caught out on the crank arms. After much googling and some advice from Facebook friends, identified that the LeRun has a cottered crank, found some videos about how to remove and they came apart pretty easily thereafter.
Once I had the frame free from all other parts, I began removing the paint and rust. Used a hot air gun on the paint, although realised afterwards that some wire brush attachments I got for the drill would have done the job perfectly well without the heat. Once the frame was mostly clear of paint and rust, I treated it with a rust converter and my canvas was ready.
I mocked up a range of 14 colour schemes in total and between my 8-year-old daughter Ella and I, we chose a sky blue with yellow scheme. Ordered the spray paints and then primed the frame, followed by 2 main colour coats.


I’d also manged to steam the original decals off the frame. With photos of these I used photoshop to create a template which I then printed on to stencil film and after some careful work with a craft knife, I had a stencil ready to use. I sprayed the secondary colour on to the frame i.e. the letters themselves – and had a load of yellow overspray on my freshly painted sky blue frame. In hindsight, I should have sprayed yellow first and then masked the letters themselves before laying down the main colour.
After that I applied a metal varnish to try and protect the paint. I’ve realised now I need something more durable (after the skatebike fell and left a nice sky blue streak on the living room wall) so will be getting some 2K acrylic clear coat laquear and recoating the frame with that.
I tried the coke and tin foil approach to remove rust from the other metal parts, but it wasn’t particularly effective. Then tried vinegar but that had basically no impact either. So got the wire brush drill attachments going again and used them to clean up every nut and bolt, as well as the crank and crank arms. Came out nicely and seemingly no damage inflicted either, will definitely take this approach on my next one!
Then began reassembly, putting everything carefully back together. Thank god for the teardown photos! After seeing the price of skate/longboard wheels I looked around on Facebay (A UK Facebook selling group) and picked up a penny skateboard for £3 with some yellow wheels on it. They seem perfectly acceptable for now! Got a cheap coloured chain and pedals delivered and popped them on. Realised I hadn’t done anything to the seat handle so stripped that and painted that up too, and then some yellow faux leather to recover the seat.
And there you have it. I’m really pleased with the result, I’m so glad this relic has stayed with me throughout the years, and I’ve taken the time to give it the makeover it deserved. There’s plenty of things I could have done better, and I’ll learn from those mistakes on the next renovation – I managed to pick up another one off Facebay for a stupidly low price, and it was actually advertised as a unicycle! Looking forward to when that gets delivered and starting the next project. I’m thinking hot pink and neon yellow…
Nick W (UK)
France MAX Poster and Price List
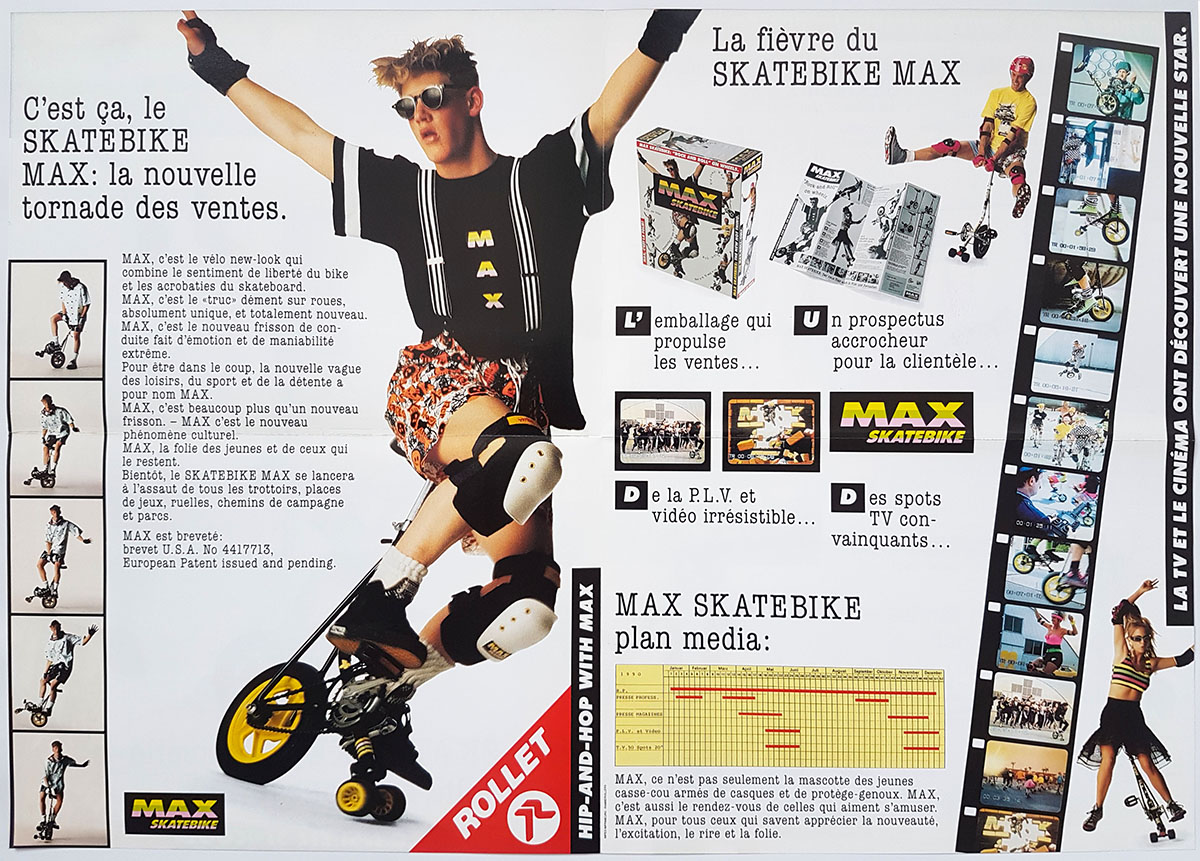
Here is the 1989 French poster for MAX in France and the component price list from Joh N’s collection. MAX was clearly going for a more hip older audience.
-

- France Max Ad Front

-

- France Max Ad Back

France component price list